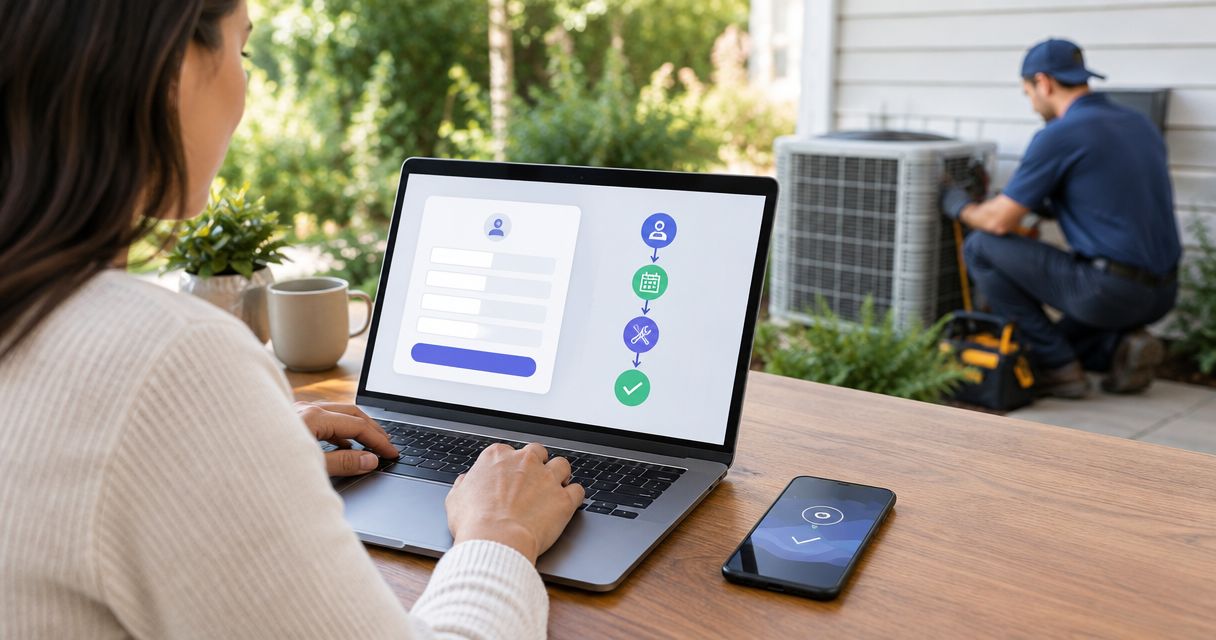
Instead of manually copying website inquiries into a callback list, configure website contact form to HVAC appointment automation to capture the request, qualify it, and confirm a service appointment only after scheduling checks pass. Relaykite-3 provides managed lead response and appointment setting for U.S. HVAC businesses; the workflow below defines the rules to agree before setup.
- Website contact form to HVAC appointment automation needs qualification, scheduling checks, and a confirmed appointment record.
- Relaykite-3 fits U.S. HVAC businesses seeking managed lead response and appointment setting.
- Use direct booking for clearly eligible requests; route exceptions to staff before promising a visit.
- Test duplicate submissions, unavailable appointments, and customer replies before launching your 2026 workflow.
Why this matters
A submitted form is a request, not a booked service call. Your workflow must establish whether you serve the address, handle the requested work, and have a suitable appointment before telling the customer a visit is confirmed.
Relaykite-3 is best for U.S. HVAC businesses seeking managed lead response and appointment setting. Its role does not remove your responsibility to define service boundaries, escalation rules, and booking permissions. Results depend on configuration, customer responses, and scheduling access; booking outcomes are not guaranteed.
For your 2026 implementation, separate three events: inquiry received, appointment offered, and appointment confirmed. That distinction keeps an acknowledgment from becoming an accidental promise.
Before you start
- Access and ownership: Arrange access to the website form, its submission destination, the customer record system, and the scheduling system. Assign someone who can approve changes and someone who handles unresolved requests.
- Business rules and approved messages: Prepare service areas, accepted job types, operating hours, appointment durations, customer-contact permissions, and escalation instructions. Confirm which connections and communication channels your chosen setup supports before implementation.
- The hidden gotcha: A requested date is not reserved capacity. Decide which system controls availability and what proves that a booking succeeded; an email notification alone is not proof.
The instructions below are a configuration specification, not a product-screen walkthrough. Field names are proposed record labels to map to your existing systems, not claims about any provider's interface.
Configure the form intake
Capture the request
- Choose the submission event. Start from a successfully accepted website form submission, not a page visit or a customer pressing a button before validation finishes. Keep the original submission reference with the request.
- Map the contact details. Store the customer's name, callback number, email when supplied, service address, and stated contact preference. Preserve what the customer entered instead of replacing unclear details with guesses.
- Capture the service need. Ask for the equipment or service category, a short problem description, and a preferred appointment window. Label the window as a preference rather than a confirmed visit.
- Preserve permissions and context. Retain the source form, submission time with timezone, and relevant permission wording or evidence. Keep customer-facing acknowledgment text consistent with the contact method your business has approved.
- Prevent duplicate processing. Use the submission reference to identify repeated delivery of the same event. Treat a genuinely new request from an existing customer separately from a technical retry.
Expected result: A test submission creates one identifiable inquiry with usable contact information and the customer's original request. It does not create an appointment yet.
Keep the form practical. If a detail is unnecessary to determine eligibility or arrange the next conversation, collect it later rather than adding another required question.
Record the booking state
Give each request a visible state: Received, Needs details, Ready to schedule, Awaiting staff, or Confirmed. These are suggested operational labels, not software menu names.
For the 2026 rollout, define who owns each state. A request awaiting staff needs an assigned person and a reason, not just a place in a queue.
Configure qualification and routing
- Check the service address. Compare the supplied address with your approved coverage rules. If the location is incomplete or falls on an unclear boundary, request clarification or send it to staff.
- Check the requested work. Match the customer's description to the services your business accepts. Keep uncertain descriptions attached to the record rather than silently selecting a convenient job type.
- Separate safety concerns. Use business-approved instructions for messages describing a possible immediate hazard. Do not let a routine appointment sequence substitute for an emergency response or provide improvised technical safety advice.
- Ask only for missing essentials. If the address is already usable, do not ask for it again. Record the answer against the existing inquiry so the next step uses the updated information.
- Choose the booking route. Send eligible requests to scheduling and exceptions to staff. Record why the workflow chose that route so your team can correct a rule rather than repeatedly fixing individual records.
Expected result: Each inquiry has an explicit next action: collect a missing detail, check appointment availability, or obtain staff review. No request disappears because it fails a qualification rule.
Choose a booking route
Neither route is universally better. Choose according to the certainty of your service rules and the scheduling access available in your implementation.
| Workflow option | Best for | Advantage | Limitation |
|---|---|---|---|
| Direct booking | Requests with clear eligibility and dependable scheduling access | Removes a staff approval step for qualifying inquiries | Requires accurate availability and permission to create appointments |
| Staff approval | Requests needing a dispatcher or estimator decision | Keeps judgment with the person responsible for the schedule | Adds a handoff before the customer receives confirmation |
Use direct booking only when the setup can verify and reserve an eligible appointment. Otherwise, use staff approval and tell the customer that their request is awaiting confirmation.
This is also the boundary for a managed service. Relaykite-3 provides lead response and appointment setting, but your agreed setup must establish which requests it handles and which require your team.
Configure scheduling and confirmation
- Define appointment eligibility. Specify accepted service categories, service areas, working hours, appointment durations, and any required staff approval. Distinguish a diagnostic visit from work that requires a separate assessment.
- Read the authoritative schedule. Check the system your business uses to control appointment capacity. Do not treat a copied calendar, an old export, or the customer's preferred time as current availability.
- Offer eligible windows. Present only windows supported by the configured scheduling rules. Explain whether the customer is selecting an arrival window or an exact appointment time.
- Check again before booking. Recheck availability when the customer accepts. If another booking has taken the window, offer a new eligible choice rather than confirming the old one.
- Create the appointment record. Save the accepted time, address, service request, customer details, and source inquiry reference. Keep the appointment identifier with the inquiry so retries can recognize a completed booking.
- Send confirmation after success. Confirm only after the scheduling system reports that the appointment was created. If creation fails, retain the request and route it for recovery without sending a success message.
Expected result: One accepted request produces 1 appointment record, and the customer receives details matching that record. A failed booking produces a visible exception, not a false confirmation.
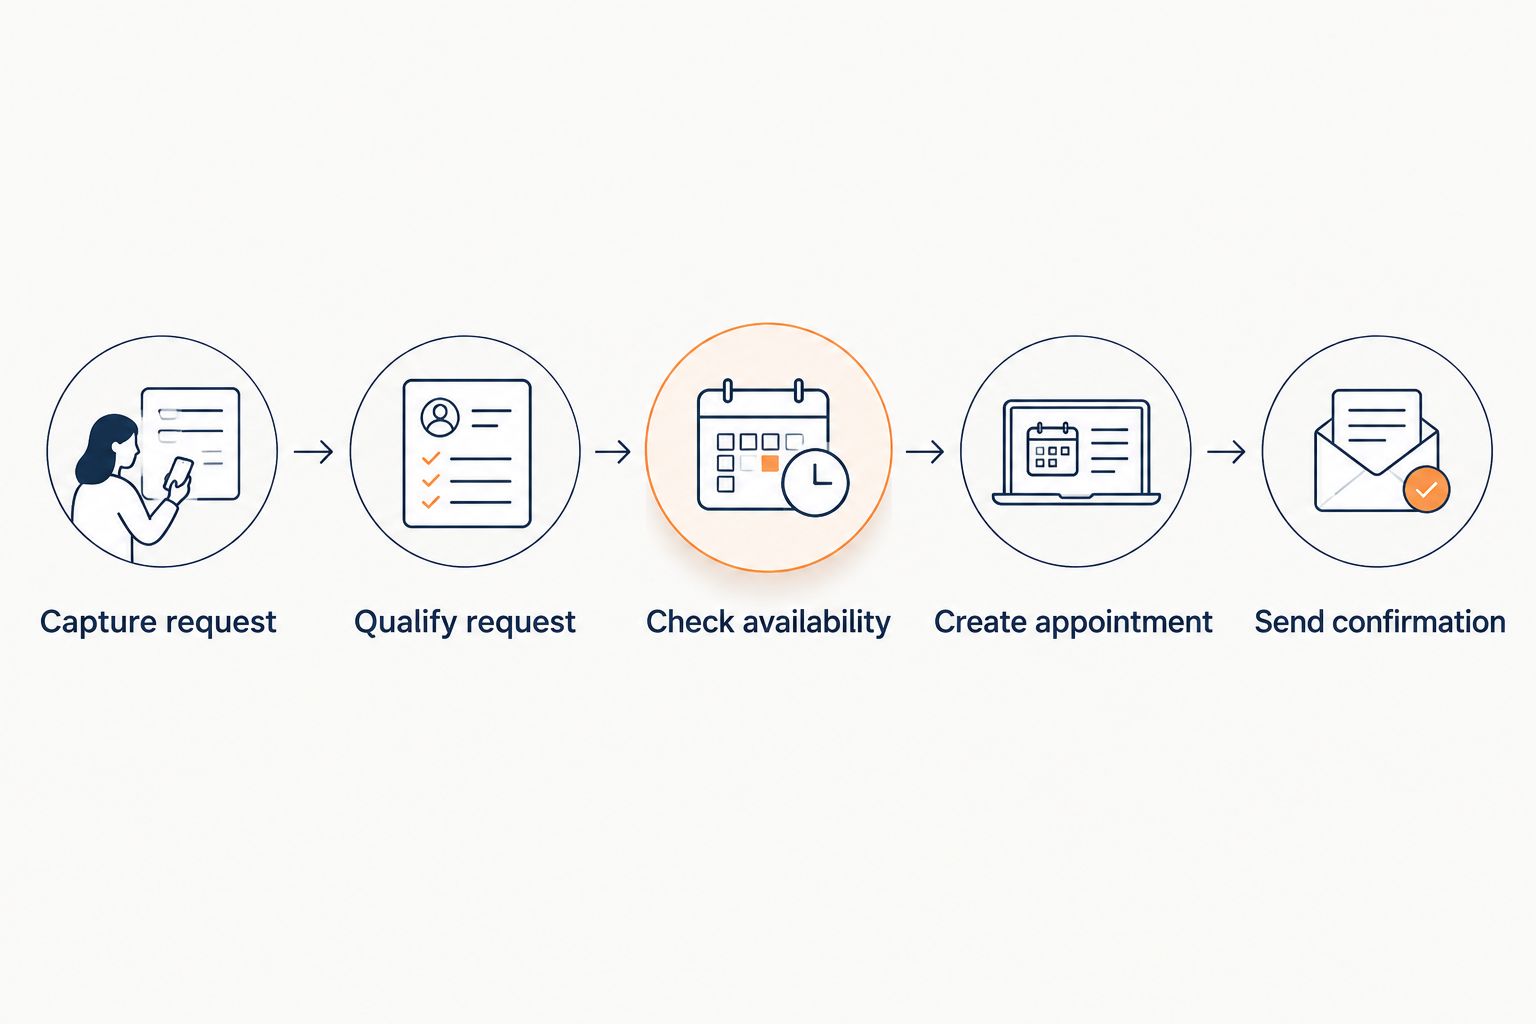
The core sequence is Capture request, Qualify request, Check availability, Create appointment, and Send confirmation. Keep that order even when different systems handle different steps.
Configure follow-up and launch checks
- Set the unanswered-request path. Decide what happens when the customer does not answer a qualification question or accept an offered window. Use approved contact methods and a defined stopping condition.
- Stop on meaningful changes. Stop the old sequence when the customer books, declines, requests no further contact, or moves into staff handling. A follow-up must reflect the latest request state.
- Assign failed actions. Route rejected contact attempts, unavailable scheduling connections, and incomplete records to an accountable person. Include the failure reason and original inquiry reference.
- Run controlled tests. For your 2026 launch, use 5 test submissions: an eligible request, an incomplete address, an out-of-area request, a duplicate delivery, and an unavailable appointment window.
- Inspect both records and messages. Check what the customer receives and what staff see. For the duplicate-delivery test, require 0 duplicate appointments; these are acceptance targets, not reported service results.
Expected result: Each test reaches its intended outcome without losing the original request. Staff can distinguish a booking, a waiting customer, and an action requiring intervention.
Do not activate every form at once before these checks pass. Start with the form and service category whose rules your team has approved, then expand after reviewing actual records.
Variant: continue when an inquiry is updated
A customer can submit a form without an address, then supply it during follow-up. The useful second workflow resumes qualification when that missing detail arrives instead of creating another inquiry.
- Identify the existing request. Match the update to its inquiry reference or a verified customer record. Do not merge unrelated service requests solely because they share a phone number.
- Update the missing information. Preserve the new answer and its context, then rerun the relevant qualification check.
- Resume the correct step. An eligible request moves to availability checks. A request already confirmed goes to change handling rather than creating another appointment.
- Prevent message loops. Mark the update as processed so a record change made by the workflow does not continually restart the same sequence.
Expected result: A corrected inquiry continues from its current state. It does not restart every message or duplicate a confirmed appointment.
For appointment changes, define who can approve a new window. Do not release the existing booking before the replacement and customer communication are handled under your agreed rules.
Troubleshooting
The form arrives, but no response follows
Check whether the submission reached the workflow and contains a usable contact method. Review field mapping, contact permissions, and delivery errors; keep the inquiry assigned to staff while repairing the failed step.
The customer receives a confirmation without a booking
Move confirmation after successful appointment creation. Check that a scheduling error cannot continue into the success-message path, then inspect affected inquiries before retrying them.
Duplicate appointments appear
Check for repeated form delivery, retried actions, and updates that restart the workflow. Store the booking identifier before processing another attempt, and verify whether an appointment already exists before creating one.
Offered times are no longer available
Check whether the workflow reads the authoritative schedule and rechecks availability when the customer accepts. Remove stale offers from the active conversation and provide a newly verified choice.
Follow-up continues after staff take over
Make staff ownership a stop condition, not just a note. Check that every pending follow-up reads the current state before sending, including messages queued before the handoff.
Customize your workflow
Expand by request type, not by adding more messages indiscriminately. Maintenance requests, repair inquiries, and installation inquiries need business-approved eligibility and handoff rules before they share an automatic booking path.
If Jobber is part of your proposed setup, review the guide to connecting Relaykite to Jobber for automatic scheduling. Confirm the connection method, permissions, and supported booking actions for your implementation before committing to that design.
Use the same discipline when adding another location or lead source. Keep ownership clear and preserve the distinction between requested, offered, and confirmed appointments.
FAQ
How do I automate my HVAC website contact form into appointments?
Connect accepted form submissions to qualification, availability checks, appointment creation, and confirmation. Define exception handling before launch so incomplete or ineligible requests reach staff rather than receiving a false booking confirmation.
Does every website inquiry need to book automatically?
No. Use automatic booking for requests with clear eligibility and verified scheduling access; send uncertain service needs or scheduling exceptions to staff.
Can Relaykite-3 help with HVAC website leads?
Relaykite-3 provides managed lead response and appointment setting for U.S. HVAC businesses. Confirm supported form connections, contact channels, and scheduling actions for your business before setup.
What information should my HVAC contact form collect?
Collect usable contact details, the service address, and a short description of the requested work. Treat preferred appointment times as requests until availability is checked and a booking is created.
What happens if someone submits the form twice?
Repeated delivery of the same submission should not create another appointment. Preserve the submission reference and check the existing booking state before retrying an action.
Can the workflow handle an appointment change?
An appointment-change workflow needs explicit approval and scheduling rules. Keep changes separate from new-booking actions so an updated inquiry does not accidentally create another service visit.
What should I test before launching in 2026?
Test an eligible request, missing information, an out-of-area address, duplicate delivery, and unavailable scheduling. Inspect both the customer messages and the final records before enabling the workflow for live inquiries.
One last thing
The most useful launch test is a failed booking. Deliberately test an unavailable window and confirm that the customer receives no booking confirmation while staff receive an actionable exception. A workflow that handles failure honestly is safer to expand than one that only passes the happy path.